Github Actionsを作る時には、Rest APIを使うのが一般的です。「GithubのGraphQL APIをも快適に使えるか」という質問がありました。いろいろ調べてみて、答えは「Yes」でした。今日は設定方法を紹介したいと思います。
テンプレートをcloneし、API用のライブラリをインストール
Github Actionsのテンプレートをcloneしましょう。
$ git clone https://github.com/actions/typescript-action.git
$ npm install
APIを呼ぶためのライブラリをインストールしましょう。
$ npm install @actions/github --saveGithub ActionsにAPIをcallできるようにtokenを設定する
APIを呼ぶために、PAT(Personal Access Token)が必要となります。ただし、Github Actionsの中であれば、PATをわざわざ手動で生成する必要はありません。デフォルトのtokenを使いましょう。
action.ymlに以下を記述します。
name: 'My TypeScript Github action'
description: 'Provide a description here'
author: 'Your name or organization here'
inputs:
  token:    required: false    description: 'token of github'    default: ${{ github.token }}runs:
  using: 'node16'
  main: 'dist/index.js'
GraphQL Query, Mutationなどを定義するためのファイルを作成
pull requestの作者を取るための簡単なqueryを作ってみしましょう。
export const queryPullRequestInfo = `
  query (
    $owner: String!
    $repo: String!
    $pullNumber: Int!
  ) {
    repository(owner: $owner, name: $repo) {
      pullRequest(number: $pullNumber) {
        id
        title
        author {
          login
        }
      }
    }
  }
`;
Queryを実行する
import * as core from '@actions/core';
import * as github from '@actions/github';

import { queryPullRequestInfo } from './graphql';

async function run(): Promise<void> {
  try {
    const context = github.context;
    const token = core.getInput('token');
    const octokit = github.getOctokit(token);

    const graphqlPr = await octokit.graphql(queryPullRequestInfo, {
      owner: context.repo.owner,
      repo: context.repo.repo,
      pullNumber: context.payload.pull_request!.number,
    });

    core.debug(JSON.stringify(graphqlPr, null, 2));
  } catch (error) {
    if (error instanceof Error) core.setFailed(error.message);
  }
}

run();
トランスパイルしてGithubへcommitしてみたら、デバッグ情報にpull requestの情報が表示されるようになりました。
$ npm run all※. core.debugで出力される情報が表示できるように、secretsにACTIONS_STEP_DEBUG: trueを追加してください。

型定義を追加する
GraphQLのレスポンスが返ってくるが、型がないと、深い階層にあるデータの取得は安全ではありません。型定義を追加してみましょう。
$ npm install @octokit/graphql-schema --saveimport * as core from '@actions/core';
import * as github from '@actions/github';
import { type Repository } from '@octokit/graphql-schema';
import { queryPullRequestInfo } from './graphql';
async function run(): Promise<void> {
try {
const context = github.context;
const token = core.getInput('token');
const octokit = github.getOctokit(token);
const graphqlPr = await octokit.graphql<Repository>(queryPullRequestInfo, { owner: context.repo.owner,
repo: context.repo.repo,
pullNumber: context.payload.pull_request!.number,
});
core.debug(JSON.stringify(graphqlPr, null, 2));
} catch (error) {
if (error instanceof Error) core.setFailed(error.message);
}
}
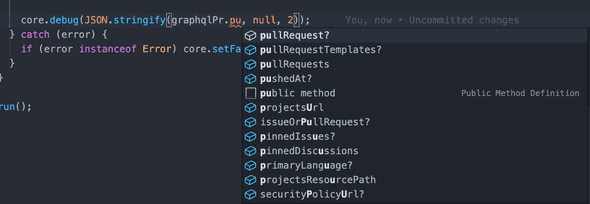
run();これで型の追加でintellisenseができるようになりました。まずパスの指定ミスを防げるようになったでしょう。

GraphQL Query, Mutationのintellisenseを有効へ
GraphQLのqueryなどを書く時、schemaを読み込めば、intellisenseが有効になります。もちろん、GraphQLの型ミスなどを防げるため、設定しておいた方がいいでしょう。
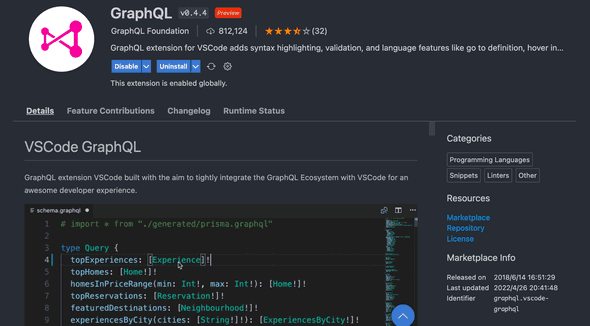
- VSCodeにGraphQLのプラグインをインストールしましょう。
自分がgraphql.vscode-graphqlを使っています。

- GraphQLの設定ファイルを作る
Github APIのGraphQLのschemaはここにあります。https://docs.github.com/en/graphql/overview/public-schema
では、設定ファイルを新規して記入しましょう。
schema: 'https://docs.github.com/public/schema.docs.graphql'- Queryにコメントの追加にてintellisenseを有効にする
VSCodeのプラグインであれば、デフォルトgqlなどでラップした文字列のみintellisenseが有効になります。TypeScriptファイルに単純な文字列にも効くように、#graphqlコメントが必要となります。
export const queryPullRequestInfo = `#graphql  query (
    $owner: String!
    $repo: String!
    $pullNumber: Int!
  ) {
    repository(owner: $owner, name: $repo) {
      pullRequest(number: $pullNumber) {
        id
        title
        author {
          login
        }
      }
    }
  }
`;
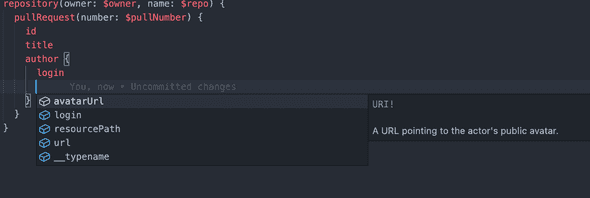
Queryを書く時のintellisenseもOKになりました。

完了
資料がなかなかなくて結構時間がかかりました。ご参考までに。
※. サンプルプロジェクト。

